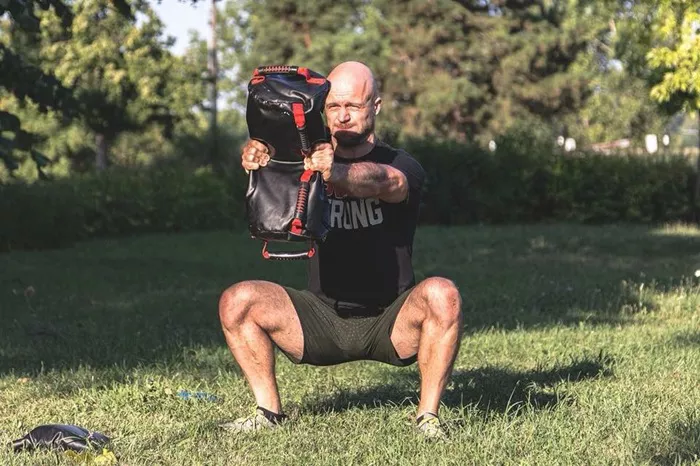
Backpack squats are a creative and effective form of resistance training. This variation of the traditional squat uses a loaded backpack instead of gym weights. It is ideal for people who train at home, travel often, or want a low-cost workout solution. Backpack squats are not just convenient—they are also powerful for building strength and improving muscular endurance.
The technique mimics a front squat. The backpack is loaded with books, water bottles, or other heavy objects and is worn on the front or back. It challenges the same muscle groups as a barbell squat, primarily targeting the quadriceps, glutes, hamstrings, and core.
Why Are Backpack Squats Important?
Backpack squats offer flexibility, especially for home workouts. They allow people to train the lower body without expensive gym equipment. These squats are also effective for developing lower-body power and stability. Backpack squats help individuals stay consistent in their training routines, whether at home or on the go.
This exercise is also ideal for beginners. It teaches proper squat mechanics before progressing to barbells. For advanced lifters, backpack squats can serve as accessory work or as part of an Anaerobic Training program.
Muscles Worked During Backpack Squats
Backpack squats engage many muscle groups:
- Quadriceps: These are the primary movers during the ascent phase of the squat.
- Gluteus Maximus: The glutes extend the hips and stabilize movement.
- Hamstrings: These muscles assist with hip extension and knee stabilization.
- Core Muscles: The abdominals and lower back stabilize the spine.
- Calves: These muscles help with ankle stability during the movement.
How to Perform Backpack Squats Correctly
Correct form is essential to maximize benefits and avoid injuries.
Step-by-Step Instructions:
Step 1: Prepare the backpack. Fill the backpack with items like books or bottles to add weight. Ensure it’s zipped and balanced.
Step 2: Position the backpack. Wear it on your back for a back squat variation, or hug it to your chest for a front squat variation.
Step 3: Set your stance. Stand with feet shoulder-width apart. Point toes slightly outward.
Step 4: Brace your core. Tighten your abdominal muscles and keep your back straight.
Step 5: Begin the descent. Push hips back and bend your knees. Keep your chest up and heels grounded.
Step 6: Reach parallel. Lower until your thighs are at least parallel to the floor. Do not let knees cave inward.
Step 7: Push through the heels. Return to standing position. Squeeze your glutes at the top.
Common Form Mistakes to Avoid
- Letting knees collapse inward
- Leaning too far forward
- Rounding the back
- Lifting heels off the ground
- Holding breath instead of using proper breathing technique
Benefits of Backpack Squats
Backpack squats offer several advantages for people at all fitness levels:
- Low Equipment Requirement: A sturdy backpack is all you need.
- Cost-Effective: No need for gym memberships or machines.
- Convenient: Train at home, while traveling, or outdoors.
- Functional Strength: Improves real-world movements like bending and lifting.
- Improves Anaerobic Capacity: When done with intensity, backpack squats serve as excellent Anaerobic Exercise At Home.
Programming Backpack Squats into a Workout Plan
Backpack squats can fit into many types of fitness plans. Here’s how to integrate them into various goals:
Strength Training:
- 3–5 sets of 5–8 reps
- Use a heavy backpack with challenging weight
- Rest 2–3 minutes between sets
Muscle Endurance:
- 3–4 sets of 12–20 reps
- Use moderate weight
- Rest 30–60 seconds between sets
Cardio and Conditioning:
- Include in a high-intensity circuit
- Do squats for 45 seconds, rest for 15 seconds
- Pair with jumping jacks or burpees for a Cardio Workout
Backpack Squats vs. Other Squat Variations
Let’s compare backpack squats to other popular squat types:
| Squat Type | Equipment | Difficulty | Best For |
|---|---|---|---|
| Backpack Squats | Backpack with weight | Beginner–Intermediate | Home workouts, beginners |
| Bodyweight Squats | None | Beginner | Warm-ups, mobility |
| Barbell Back Squats | Barbell, rack | Advanced | Building strength, hypertrophy |
| Goblet Squats | Dumbbell or kettlebell | Intermediate | Core strength, balance |
Safety Tips for Backpack Squats
Always prioritize safety to prevent injuries:
- Use a sturdy and well-stitched backpack
- Distribute weight evenly inside the pack
- Warm up before squatting
- Don’t overload with too much weight too soon
- Stop if you feel pain or discomfort
Modifications and Variations
Backpack squats can be customized based on fitness level:
For Beginners:
- Start with an empty backpack
- Do bodyweight squats first to learn form
For Intermediate to Advanced:
- Add more weight to the backpack
- Perform tempo squats (3 seconds down, 1 second up)
- Add a jump at the top for a plyometric challenge
Incorporating Backpack Squats into Full-Body Workouts
Here is a sample full-body circuit that includes backpack squats:
20-Minute Full-Body Workout:
- Backpack squats – 15 reps
- Push-ups – 10–15 reps
- Backpack rows – 12 reps
- Jumping jacks – 30 seconds
- Plank – 45 seconds
Repeat for 3–4 rounds. Rest 60 seconds between rounds. This is a solid Cardio Exercise Plan that includes strength training and aerobic elements.
Conclusion
Backpack squats are an effective, simple, and accessible form of resistance training. They require minimal equipment and space, yet they deliver serious fitness results. Whether you’re just starting out or looking to mix up your routine, backpack squats are a valuable addition to your workout plan.
They help improve lower-body strength, core stability, and overall conditioning. These squats are also a perfect fit for Anaerobic Training At Home when performed with intensity and structure.
So grab your backpack, load it wisely, and squat your way to a stronger and fitter body—anytime, anywhere.

